 Isaiminia World Breaking News & Top Stories
You’ve done it before — carefully peeled back the film, lowered the screen protector onto your phone, and watched in frustration as bubbles appeared one after another, turning what should have been a clean install into a blurry, dimpled mess. It’s one of the most common and annoying experiences smartphone users face, and it often ends with a wasted protector and a second trip to the store.
Beyond the installation headache, leaving your screen unprotected is a real risk. Daily scratches, smudges, and accidental drops can degrade your display over time — and in bright outdoor environments, screen glare makes it nearly impossible to read messages or navigate apps comfortably. An anti glare screen protector solves both problems at once, shielding your device while dramatically improving visibility under direct sunlight or harsh indoor lighting.
This guide walks you through everything you need to achieve a flawless, bubble-free installation — from setting up the right workspace to applying the protector with precision. Whether you’re doing this for the first time or trying to finally get it right, you’ll find clear, practical steps that actually work. The result: a protected screen, reduced eye strain, and crystal-clear visibility every day.
Why Anti Glare Phone Screen Protectors are Essential for Smartphone Users
Your smartphone screen faces constant threats — keys in your pocket, rough surfaces, accidental drops, and the relentless friction of daily use. Without a protective layer, even minor contact can leave permanent scratches that degrade display clarity over time. Phone screen protectors act as a sacrificial shield, absorbing that damage so your actual display doesn’t have to. For anyone who relies on their device throughout the day, that protection isn’t optional — it’s practical.
Anti-glare technology takes this a step further by addressing a problem that standard protectors ignore entirely: visibility in bright conditions. Whether you’re checking directions under direct sunlight or working near a bright window, glare turns your screen into a mirror. An anti-glare coating diffuses reflected light, making content readable without cranking up brightness — which in turn reduces eye strain during extended use and preserves battery life.
For budget-conscious users, the good news is that effective protection doesn’t require expensive options. Many manufacturers now offer eco-friendly phone accessories made from sustainable or recycled materials, giving you durability without the environmental cost. Brands like MagicJohn, for instance, produce anti-glare protectors using recycled materials that meet this balance of affordability and responsibility. These options are increasingly affordable and widely available, making it easier to protect your device responsibly. Investing in the right screen protector once saves you from costly screen repairs later — a straightforward trade-off that benefits both your wallet and your daily experience.
Preparing for Installation: Tools and Environment for Dust-Free Screen Protectors
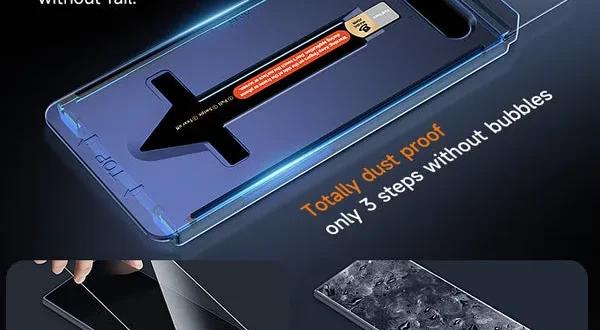
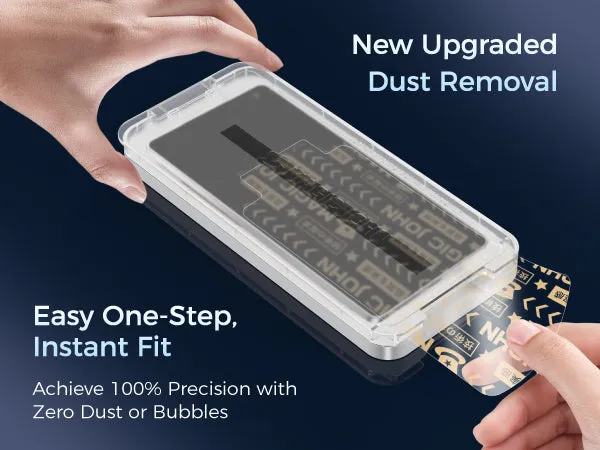
A successful installation begins long before you peel back the protective film. The single biggest cause of bubbles isn’t poor technique — it’s dust particles trapped between the screen and the protector. Even a single speck can create a visible bubble that no amount of smoothing will fix. Getting your tools and environment right from the start is what separates a clean install from a frustrating one.
You’ll need three core items: a microfiber cloth, dust removal stickers (sometimes called lint rollers or tack stickers), and a screen-safe cleaning solution. Most quality screen protectors include these in the packaging, but having extras on hand is smart. The microfiber cloth removes oils and smudges without scratching, the cleaning solution loosens stubborn residue, and the dust stickers pick up any remaining particles right before application — the step most people skip and later regret.
Your workspace matters just as much as your tools. Avoid installing in high-traffic areas where movement stirs up dust. A bathroom works surprisingly well — running a hot shower for a minute before you start settles airborne particles. Turn off any fans or air conditioning vents nearby. Work on a flat, stable surface under good lighting so you can spot dust on the screen before it becomes a problem. Taking five minutes to set up properly makes dust-free screen protector installation far more achievable, even on your first attempt.
Step-by-Step Guide to Bubble-Free Protection Installation
Thorough Cleaning: The Foundation of a Bubble-Free Install
Start by washing your hands thoroughly — skin oils transfer easily and will undo your cleaning work the moment you touch the screen. Apply a small amount of screen-safe cleaning solution to your microfiber cloth, never directly onto the phone, and wipe the display in a single direction rather than circular motions. Circular wiping just redistributes oils instead of removing them. Follow with a dry section of the cloth to lift any remaining moisture. Once the screen looks clean, hold it at an angle under your light source — you’re looking for smudges, streaks, or particles that catch the light. If you spot any, repeat the wipe. The final step before application is running the dust removal sticker across the entire screen surface. This picks up microscopic particles that the cloth leaves behind and is the single most important step most people skip.
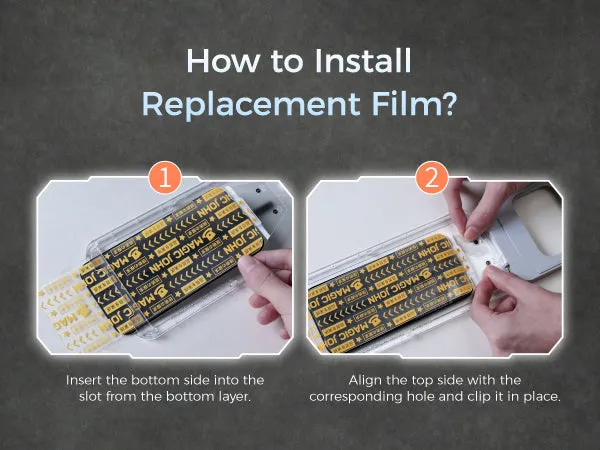
Perfect Alignment: Positioning Your Anti Glare Screen Protector
Peel back only the first layer of the backing film — the side that faces your screen — without touching the adhesive surface. Hold the protector above the phone and use the camera cutout, speaker grille, or home button as reference points to find your positioning before anything touches the display. Many premium anti glare screen protectors, including those from MagicJohn, include an alignment frame or guide stickers that attach to the phone’s edges, creating a physical boundary that makes precise placement nearly effortless. If yours doesn’t include one, a strip of tape positioned along one edge of the phone serves the same purpose as a hinge point. Take your time here. Rushing alignment is what leads to crooked installs that can’t be corrected without lifting the protector and introducing new dust.
Application Techniques: Avoiding Bubbles During Installation
The hinge method is the most reliable approach for a controlled, bubble-free application. Secure one short edge of the protector to the top of the phone using a small piece of tape, letting it act as a hinge. Lower the protector slowly from that fixed edge downward, allowing it to settle onto the screen section by section rather than all at once. As it makes contact, use a card — a credit card or the squeegee included in most kits — to smooth from the center outward in firm, overlapping strokes. This pushes trapped air toward the edges rather than letting it pool in the middle. Work methodically, applying steady pressure without dragging. Once fully applied, do a final pass across the entire surface with the card to seat the adhesive evenly and eliminate any remaining air pockets along the edges.
Troubleshooting Common Issues: Ensuring Clear Visibility and Touch Sensitivity
Even with careful preparation, small bubbles sometimes appear after installation. The good news is that most of them aren’t permanent. Air bubbles — the kind without dust underneath — typically resolve on their own within 24 to 48 hours as the adhesive fully bonds to the screen. For stubborn ones, press firmly from the center of the bubble outward toward the nearest edge using a card wrapped in a soft cloth to avoid scratching the protector’s surface. Repeat this motion several times with consistent pressure rather than one hard push.
Bubbles that don’t disappear after 48 hours usually mean trapped dust. At that point, the cleanest fix is to lift the protector carefully from one corner using tape — not your fingernail — and use a fresh dust sticker on both the screen and the adhesive side before reapplying. Work quickly to minimize re-exposure to airborne particles.
Touch sensitivity issues are less common with quality anti-glare protectors but can occur if the protector isn’t fully seated along the edges. Run your card firmly around the entire perimeter to ensure complete adhesion. If sensitivity remains inconsistent, check that the protector hasn’t shifted and is covering the display evenly. A properly installed bubble-free protection layer should feel virtually identical to using your bare screen, with no lag, missed taps, or dead zones affecting your daily use.
Long-Term Care and the Benefits of Eco-Friendly Phone Accessories
Keeping your anti-glare protector performing well long-term requires minimal but consistent effort. Wipe the surface regularly with a dry microfiber cloth to prevent oil buildup, which can gradually dull the anti-glare coating. Avoid harsh chemical cleaners — they degrade the coating faster than normal wear. When it’s time to replace the protector, consider eco-friendly phone accessories made from recycled or biodegradable materials. These options have become increasingly accessible without sacrificing durability, letting you protect your device and reduce environmental impact at the same time. Choosing sustainable screen protectors is a small decision with a meaningful difference over the lifetime of your device.
Your Path to a Flawless, Glare-Free Screen
Installing an anti glare screen protector without bubbles isn’t a matter of luck — it’s a matter of preparation, patience, and technique. The steps covered in this guide give you everything you need to get it right: setting up a dust-free workspace, cleaning the screen thoroughly with the right tools, aligning the protector carefully before it touches the display, and applying it with a controlled hinge method that pushes air out rather than trapping it in.
Preparation is where most failed installs are actually decided. Skipping the dust sticker, rushing alignment, or working in a dusty environment will undermine even the most careful application. When you take those extra minutes upfront, the installation itself becomes straightforward and the results speak for themselves — a smooth, clear surface that protects your screen and makes it genuinely easier to see in any lighting condition.
If bubbles do appear, you now know exactly how to address them without starting over. And with the right long-term care, your protector will stay effective for months. Apply this guide on your next install, and you’ll likely never go back to guessing. A protected, glare-free screen is entirely within reach — and now you know precisely how to achieve it.